Mega Sale Domains @ Rs.99

Tuesday, January 24, 2012

Threading Hair Removal 101

Threading Hair Removal 101

threading hair, threading eyebrows Photo Credit: Jay Sullivan/Shobha/Copyright 2004
Hair Removal Ads
Threading hair is an ancient method commonly practiced in Eastern countries, like Egypt and India, but is becoming very popular here in the West. Threading removes the entire hair follicle, lasting up to 6 weeks.

How Does it Work?

A cotton thread is pulled along unwanted hair in a twisting motion, to trap hair in a mini lasso, and lifts hair right out of the follicle.

The Pros

  1. It’s extremely sanitary. Nothing but the thread touches the skin, and it’s thrown away after use.

  2. Great for people with ‘trouble’ brows. Threading has this amazing ability to be so concise in the hair that it removes. It’s sworn by people who say they can never get their eyebrows even, despite tweezing, waxing or sugaring.

  3. No chemicals are applied on the skin. When people have certain circumstances, or are taking medicines which conflicts with waxing and sugaring, they can still get threading done.

  4. It’s very fast. Although every technician is different, it takes the person who has threaded my eyebrows two minutes flat, from start to finish.

  5. Temporary results can turn into permanent. Over time, frequent threading can cause the hair follicle to become damaged, and stop growing hair.

The Cons

  1. If done incorrectly, the hairs can break. If hair is broken from an inexperienced threading professional, hair re-growth will show up much quicker.

  2. It can be hard to find someone experienced threading hair. It’s a true art that has been passed down through the generations, and isn’t something you can easily learn in a couple classes- especially to do brow shaping. Unless you live in a large metropolitan city, you probably won’t find a salon or spa that does threading.

  3. Some hair growth is necessary. 1/16 inch of hair is needed for thread to wrap around.

  4. Not generally performed on the body, only the face.


Ouch Factor

The discomfort is similar to tweezing, but the process is much, much quicker. Some people say they have very little pain from threading. Use a warm compress to relax the hair follicle for an easier exit, and apply a numbing spray if you have a low tolerance to any discomfort.

Threading Hair Removal Costs

Threading is primarily done on the face, and pricing will vary according to where the salon or spa is located, and what type of facility it is. A 15% - 20% gratuity on your total bill is customary and suggested.
  • Eyebrow (both eyebrows, including in-between) $12 - $50
  • Lip (skin right above upper lip) $6 - $20
  • Full Face $35 - $60
  • Chin $6 - $15

Threading (khite) hair removal

Threading (khite) hair removal

Threading (khite)

Basic facts

Called khite in Arabic and fatlah in Egyptian, it's a less common method in the West for removing hair at the root, used primarily on facial hair. Rows of stray hairs are yanked out with twists of cotton thread.

Description:

The practitioner holds one end of the cotton thread in his or her teeth and the other in the left hand. The middle is looped through the index and middle fingers of the right hand. The practitioner then uses the loop to trap a series of unwanted hairs and pull them from the skin. There are also devices made that can hold the thread during the procedure.

Advantages:

Inexpensive, fast, neat, considered less painful than plucking for many. Good for eyebrows and facial hair. Like plucking, results can last up to two to four weeks.

Disadvantages:

Hard to find a professional practitioner outside large cities. Can be painful and cause itching afterwards. Side effects can include folliculitis, a bacterial infection in the hair follicles, skin reddening or puffiness, and changes in skin pigment.

STEP-BY-STEP: THREADING

STEP-BY-STEP: THREADING - by Editor


One of the best methods of upperlip hair removal is threading. Threading removes the tiniest and finest hair right from the root. Here�s how you can thread at home.

Getting rid of hair on the upperlip is extremely annoying. If you get it waxed, you need for it to grow a certain length before you can wax it again. If you get it threaded at the parlour, you wait until there is a slight green shadow before visiting the parlour again. Bleach isn�t very good for the skin and it leaves the hair lighter but not completely invisible. And hair removal cream doesn�t remove the hair from the root, causing hair to grow back thicker.

The best method of hair removal from the upperlip is threading. You don�t have to wait for hair to grow a certain length � threading removes the tiniest and finest hair right from the root. Tweezing does the same as well, but tweezing is more painful, more time consuming, and tends to leave in-growths.

If you have easy access to a parlour just across your home which charges Rs. 5 for upperlip threading, you can skip this article. But if not, here�s how you can remove upperlip hair at home, easily and quickly.

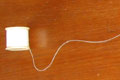
Take around 2 feet (24 inches) of thread length. Make sure you use a good quality, strong thread. There is no special thread for threading, you can use any thread as long as it is strong and doesn�t snap easily.


Take both ends and knot them up. You need to have a circle of thread. Although beauticians normally use thread straight from the reel keeping one end in their mouth and holding the other end, you don�t need to get so technical � especially because you will not be able to thread your own upperlip in this manner.


Now hold the thread with both hands, and wind it around ten times. The wound bit now lies in the center of the circle.


Now, place the thread around the fingers of both hands. Push the wound portion towards one hand by widening the fingers of one hand and simultaneously closing the fingers of the other hand.


Similarly, by opening the fingers of the closed hand and closing the fingers of the other hand, push the wound portion in the other direction.


Keep practicing pushing the wound portion back and forth. Once you are able to push back and forth easily, you can move on to the other step � practicing on a body part.


It is best to practice threading on your leg. Most people have a lot of hair on their legs and their legs are easily reachable. They don�t have to strain too much to look for hair or to reach it, and they don�t have to look in a mirror.


Sitting on your bed or on a chair, prop up one leg and identify the portion from which you want to remove hair. Place the thread on this portion. Let the wound part be one end of the hair, and the thread from the other side should be on both sides of the hair you want to remove. Now, move the wound portion to the other side, making sure that it catches the hair while moving. It will then lift the hair from the root as it moves back and forth.

You will need practice before you can manage. And if you know how to thread your upperlip yourself, you can run thread through it for a couple of minutes every other day so your upperlip is always completely free from hair. No more waiting for the hair to grow back before your next threading or waxing session at the parlour.

Threading (epilation)

Threading (epilation)


Eyebrow threading.

Threading is an ancient method of hair removal. It has also gained popularity in Western countries.

It is popular in many Arabic countries[1], as well as Indian and Persian culture where it is called Bande Abru ("Abru" means eyebrow, and "Band" is the thread). Threading the entire face is widely spread amongst Iranians, but it was originally practiced when a woman was getting married or during special occasions. In ancient Persia, threading was a sign that a girl had reached adulthood and become a woman.

Practitioners use a pure, thin, twisted cotton thread which is rolled over untidy hairlines, moustaches and so on, plucking the hair at the follicle level. Unlike tweezing where a single hair is pulled out each time, threading can remove an entire row of hair, resulting in a straighter line. However, due to a larger area of hair being removed at once, it can be quite painful for some.

Finger Drying

Finger Drying

This is a quick method of drying and styling your hair. It relies on the heat released from your hands rather than the heat from a dryer. Finger drying is suitable for short to mid-length hair.

  1. Shampoo and condition your hair, then spray with gel and comb through.
  2. Run your fingers rapidly upwards and forwards, from the roots to the ends.
  3. Lift up the hair at the crown to get height at the roots.
  4. Continue lifting as the hair dries. Use your fingertips to flatten the hair at the sides.

Tip :- Finger-drying is the best way to dry damaged hair, or to encourage waves in naturally curly, short hair.

STYLING CHECKLIST

You will need :-

  • Spray gel.
  • Styling comb.

Corrective Conditioning Treatment

Corrective Conditioning Treatment

This is mainly a deeper conditioning treatment that softens the hair quickly. You can do it tackle the following conditions:

  1. Very dry hair due to dry scalp conditions.
  2. A week after the use of any kind of hair dye or tint.
  3. Roughness due to permanent wave treatment.
  4. Dryness caused by hair straightening treatment.
  5. Roughness caused by mishandling of the hair such as excessive use of dryer and too much back combing.
  6. Swollen (Knotted) hair.
The purpose of a corrective conditioning treatment is to nourish and condition the hair shaft. The condition, whether chemical or herbal, should be protein rich to work effectively on the hair.

Corrective Conditioning Procedure

  1. Brush hair for 5 minutes to stimulate the scalp and clear dust and dirt from hair.
  2. A protein conditioner should be applied now.
  3. (Protein conditioner ingredients: Castor oil 1-2 teaspoon malt vinegar, olive oil - 1 teaspoon. 2 full eggs or more according to hair length. Mix all the items and apply thoroughly while parting hair in small sections).
  4. Heat is applied to the head by using heating cap or a scalp steamer to give uniform heat or wrap your head in a hot towel for half an hour.
  5. Reheat the towel if it gets cold. Heat will activate the absorption of the conditioning elements into the hair-much faster.
  6. Use mild shampoo to wash hair.
  7. Towel dry hair to remove excess moisture.
  8. Dry and style hair.

(Note: If a chemical commercial conditioner is used, manufacturer's instructions should be followed.)


Girl Blow Drying For Smooth, Shiny Hair.

Girl Blow Drying

Girl Blow Drying For Smooth, Shiny Hair.

By following our step by step you can achieve the Smooth, Shiny and sleekest blow dry ever.

  1. Shampoo and condition your hair.
  2. Comb through with a wide toothed comb to remove any tangles.
  3. Partially dry your hair to remove excess moisture.
  4. Apply a handful of mousse to the palm of your hand.
  5. Using your other hand, spread the mousse through the hair, distributing it evenly from the tips to the ends.
  6. Divide your hair into two main section by clipping the top and sides out of the way. Then, working on the hair that is left free and taking one small section at a time, hold the dryer in one hand a styingg brush in the other. Place the brush underneath the first section of the hair, positioning it at the roots. Keeping the tension on the hair taut (but without undue stress), move the brush down towards the ends, directing the air flow from the dryer so that it follows the downwards movement of the brush.
  7. Curve the brush under at the ends to achieve a slight bend. Concentrate on drying the root area first, repeatedly introducing the brush to the roots once it has moved down the length of the hair. Continue the movement until the first section of the hair is dry. Repeat step 6 until the whole of the back section of hair is completely dry.
  8. Release a section of hair from the top and dry it in the same manner. Continue in this way until you have dired all your hair. Finish by smoothing a few drops of serum through the hair to flattern any flyaway ends.

Blow drying and styling time will vary based on your hair texture, thickness and length.

Tips : -

  • Use the highest heat or speed setting to remove excess moisture, then switch to medium to finish drying.
  • Point the air flow dowmwards. This smoothes the cuticles and makes the hair shine.
  • When blow drying, make sure each section is completely dry before going on to the next.

What You Need : -

  • A blow dryer - For Blow Drying Hair
  • Styling hair brush
  • Serum
  • Styling hair comb
  • Mousse

Hair Straightening Tips

Hair Straightening Tips

Just like people go into great lengths to get their hair permed due to various reasons, similarly people with naturally go into great lengths to get their hair straightened. Amazingly on some faces, lifeless and on some faces, curly hair looks ugly and untidy. Therefore, straightening is equally well practiced as permanent waving. The common link between the two changes is their chemical involvement.

The practice of hair straightening involves two major steps:

  • It breaks the S (Sulphur) bonds and the N (Nitrogen) bonds in the cortex during the processing time which softens the hair.
  • The use of neutralizer works as a fixative which is necessary to restore the N and S bonds to rejoin the hair and make the hair acquire the desired straightness.

Due to the chemical involvement, the hair may get damaged. To avoid that, the first step should be to analyses the hair texture accurately.

The chemicals should never be allowed to penetrate the scalp. Therefore, it should be understood that the new growth at the scalp would acquire the original curly nature. Since the maximum hair growth in a month is of about 3/4 of an inch, you needs to do hair straightened again. Straightening is the reverse of permanent waving, that means, in this process, you make the curly hair straight by using chemical straighteners. We should be very careful while using these chemicals because sometimes it goes wrong and the client may start losing hair, so always consult your client before you start.

Points to remember before hair straightening

  1. Texture of the hair.
  2. Length of the hair.

Procedure of hair straightening

  1. Shampoo the hair; conditioner can be used if the hair is chemically treated or damaged.
  2. Make straightening gel by mixing white flour (maida), perm lotion and conditioner to avoid dryness.
  3. Start from the back by taking horizontal sections.
  4. Make sure that the hair is tangle free and neat before you start putting the file board.
  5. Heavier the hair, smaller should be the section.
  6. Put gel on the board and comb it through. Gel should not touch the scalp.
  7. Leave the gel on for 10 to 40 minutes depending on the texture. Rinse it well by using pressure water for 10 to 40 minutes.
  8. The board will come out automatically with the pressure of the water.
  9. After rinsing, comb the hair straight and leave it for 10 to 15 minutes.
  10. Put the neutralizer on the hair for 10 to 15 minutes.
  11. Rinse the neutralizer; use conditioner and comb it.
  12. Always go for a cut after straightening to make the hair even. Always cut the hair at 0° angle to avoid layers. Straight cut is recommended for a much neater and healthier look.

This straightening procedure is safe on the hair as there is no pulling.

Post care for hair straightening

  1. Have a cut once a month or once in two months.
  2. Have a done once a month.
  3. Use a serum is a must to avoid to provide shine to the hair.

Hire an advancedn for the best results.